Work with CallFire XML
CallFire XML is a markup language and, as such, does require at least a minimal level of understanding of either HTML or XML scripting. Its strength is that, as a markup language, it uses predefined tags, which have specific properties with defined attributes, making it easy to script your phone call. In addition, you can define variables to be used by your script, or make use of the many system variables we have created for you. You can also create JavaScript routines within certain tags. Basically, any markup language uses tags to define actions (or states) that define the document being created. XML is used to transport and store data. In CallFire XML, the document instance being created is a script defining the flow of a phone call, whether inbound or outbound.
IVR
CallFire allows you to use IVR for sending calls with the help of CallFire XML. Interactive voice response (IVR) is a technology that allows a computer to interact with humans through the use of voice and DTMF tones input via keypad. IVR allows customers to interact with a company's host system via a telephone keypad or by speech recognition, after which services can be inquired about through the IVR dialogue. IVR systems can respond with prerecorded or dynamically generated audio to further direct users on how to proceed. IVR systems can be used for mobile purchases, banking payments and services, retail orders, utilities, travel information and weather conditions. CallFire allows you to create both outbound and inbound ivrs.
Create an IVR
There are two ways to create IVR in CallFire:
User Interface
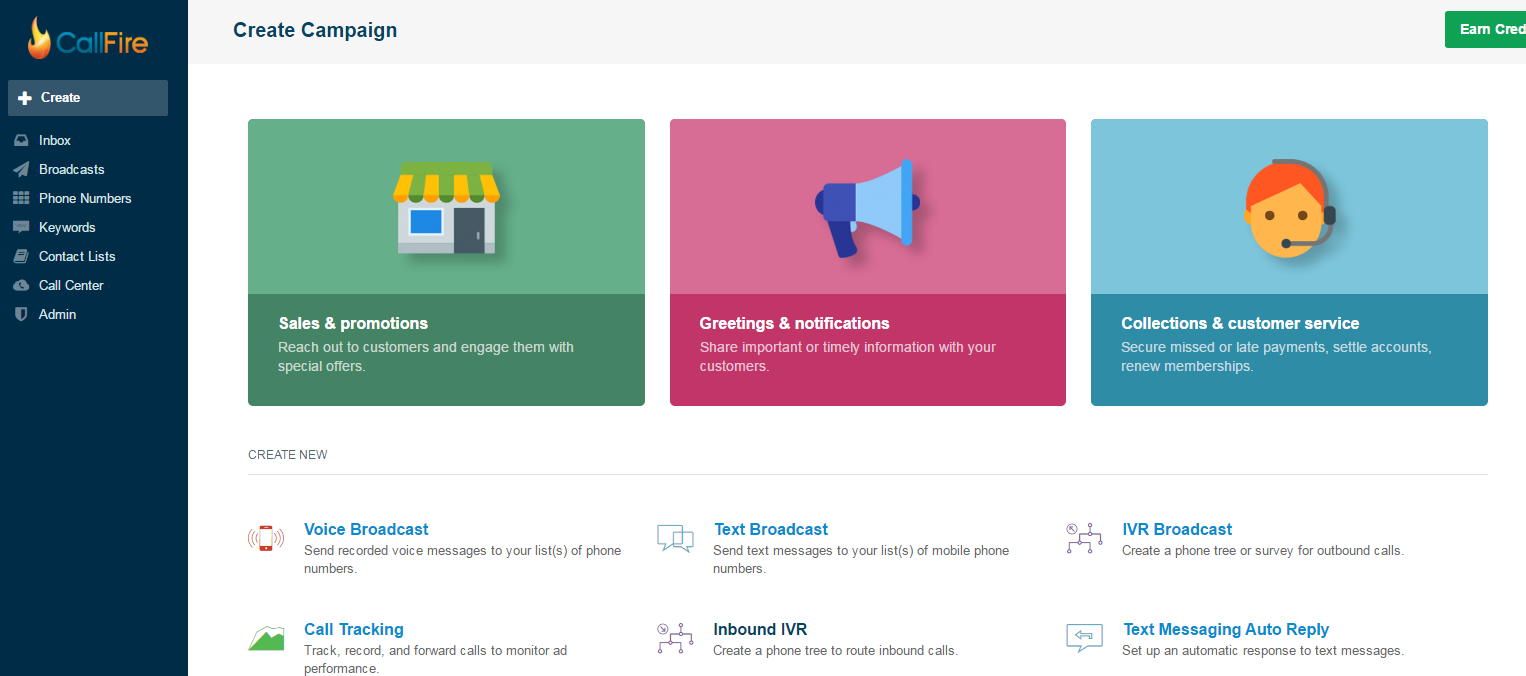
Click Create in upper left corner of the page
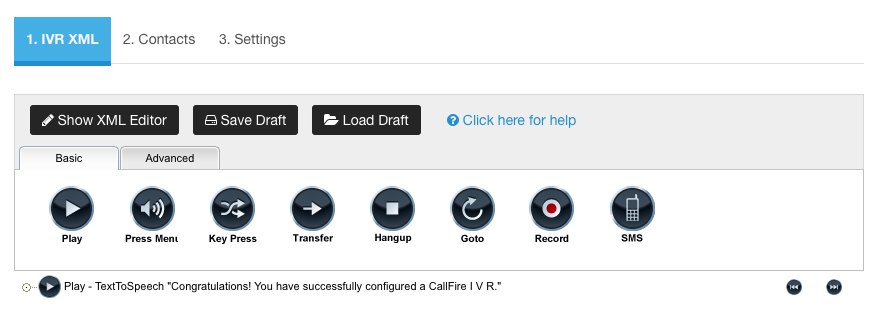
The default view is the IVR Designer workspace. This is an interactive page. You can drag icons from the Basic and Advanced tabs into the workspace where you manipulate and configure them. As you do, CallFire writes XML code for you.
Click here for help:
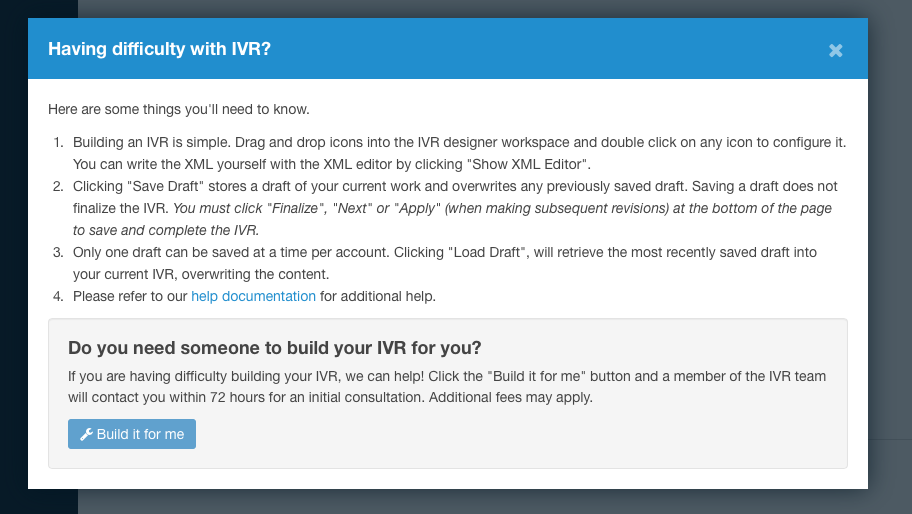
- Show XML Editor Toggle the view between the Designer and the XML Editor. On the Editor screen, you must enter actual XML code; there are no icons to drag and drop.
- Save IVR Save the IVR you are currently constructing. You can only save one version of your IVR. Each time you click on Save IVR, you will be saving the current version of your IVR, and this will overwrite any previous versions.
- Load IVR Load a previously-saved IVR.
- Build it for me Request a CallFire IVR specialist to create your IVR. Please be as specific as possible.
- Send Test Call Enter a phone number and CallFire will send you a test call.
The first time you choose this option, you will be prompted to confirm the legitimacy of the number you are entering. This is known as Verifying your Caller ID. The system will ask you to enter your phone number, and will then call you with a code that you enter into the verification box. You only need to do this once for each phone number that you register as a Caller ID.
Api
IVR Designer Basics
As you'll see, a CallFire IVR system offers you many options when creating an inbound or outbound phone tree. Whatever you create can be as a simple or complex as you desire. Here are some of the basics of how you create the structure of an IVR.
Some IVR Basics
The easiest way to think of an IVR is to remember one simple fact: Whether inbound or outbound, it is a phone tree. As with all trees, it has branches. And when you climb a tree, you have a choice of which branch you want to explore. So with an IVR, you're creating a structure, or tree, that branches out in different directions, giving your customers a myriad of choices about what direction they want to take. When you drag a button down and drop it into the workspace - which we'll talk about in the next section - you'll notice that a red exclamation-point warning appears.

This means that you need to double-click on that button, and fill in the Set Up New Action box that appears, as shown below.
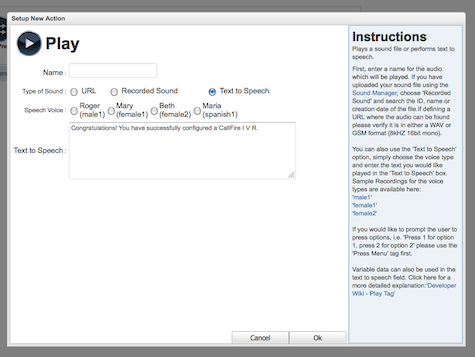
When you do so, you'll find instructions on the right-hand side of each box. You can right-click on a tag for faster creation/addition of tags. For instance, as you can see below, we have right-clicked on the Play tag, which leads to a pulldown menu being displayed. When our arrow enters the pulldown box and highlights a choice - in this case, Basic - another menu of options appears. This box shows the tags that are on that particular tab.
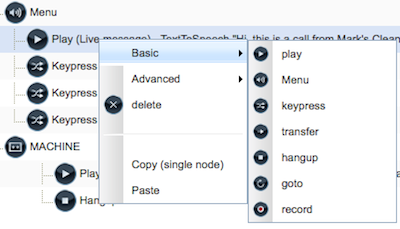
Understand Basic and Advanced Tags
The IVR Designer contains two tabs: Basic and Advanced. There are a series of icons on both tabs. Drag and drop an icon into the workspace to configure it.
Basic:
Advanced:
Other available tags:
Manipulating Tags to the Right and Left
An important aspect of IVR design is the relationship between a parent and child nodes. Certain tags are, by their nature, parents of others. For example, in CallFire XML, an Answering Machine Detection tag contains two nodes: Live (answer) and Machine (answer). These are parent nodes: everything that should happen during a live call is a child of Live, while what should happen when an answering machine picks up the call will fall under Machine. In the IVR Designer, there are always two arrow buttons in the right-hand column.

These control the indenting to the right, or movement back to the left, of your button in that row. This helps define the structure of your IVR. Below, please notice what happens when you click the right-arrow indent button.
Here, the Play tag is exactly under the Machine tag. Play is not a child of Machine, so we click the right arrow.

Now, the Play tag is to the right of Machine. It is now a child of the Machine tag. Using the arrow buttons allows us to move the tags to the right and left.

IVR XML examples
CallFire maintains a repository of sample XML code on GitHub.